
You can make absolutely anything by folding paper including my adorable pair of easy origami chicken.
My step by step origami chicken instructions will make this as simple as possible if you follow closely!
Use this for pretty house decor or just for pretend play!! You could make lots of these and gift them to little kids, who will enjoy using them as puppets!

[ez-toc]
Chicken Origami Easy
Colored craft papers are so underrated. There are just so many different things you can make using them. My fun paper crafts provide lots of fabulous ideas for kids.
During Spring my kids take a real interest in hens and their baby chicks! We actually have a farm nearby and they have lots of hens who love to visit our garden!! This fascinates my kids and they love to chase they back to their henhouse.
If you want to entertain older kids and are looking for some chick craft ideas then I would definitely recommend this chicken origami activity.
This easy origami step by step craft with instructions will help you make your own chicken origami for kids.
How to Make a Paper Chicken – Origami Chick Instructions
You can make absolutely anything by folding paper including my adorable pair of origami chicken. Step by step origami tutorial. Step 1: Prepare a square paper. Fold the paper in half diagonally, from both sides. Unfold the diagonal folds and they’ll leave creases. Step 2: Fold the corner of the square paper and join it to the center of the square. Step 3: Fold in all 4 corners of the square paper to the center of the square. Step 4: Now, fold the 4 corners of the current square pattern to the center again. Step 5: Unfold any 2 opposite corners of the last folds. Step 6: Fold the current pattern in half along the long side, keeping the corner flaps facing outside. Step 7: Hold the side corner flaps firmly in their place and fold out any one of the open corners towards the closed side of the current pattern. Step 8: Fold out the side nicely and flatten it with the rest of the pattern. Step 9: Similarly, fold out and flatten the other side. The current pattern should have 1 big triangle part and 2 open-small triangle parts. The big triangle is the body of the chicken, one of the small Step 10: Fold any one of the small triangle parts in 1/3, keeping the short part near the body part (big triangle). This fold is done to leave a neat crease line. Step 11: Unfold the last fold and your pattern should look as below. Step 12: Step 13: Trace and cut out a comb pattern and an eye. Attach the comb along the top straight side of the head part and attach the eye below the comb, on the head part of the origami chicken.
How to make an Origami Chicken
Materials
Instructions


triangles is the head and the other is the tail-feather of the chicken.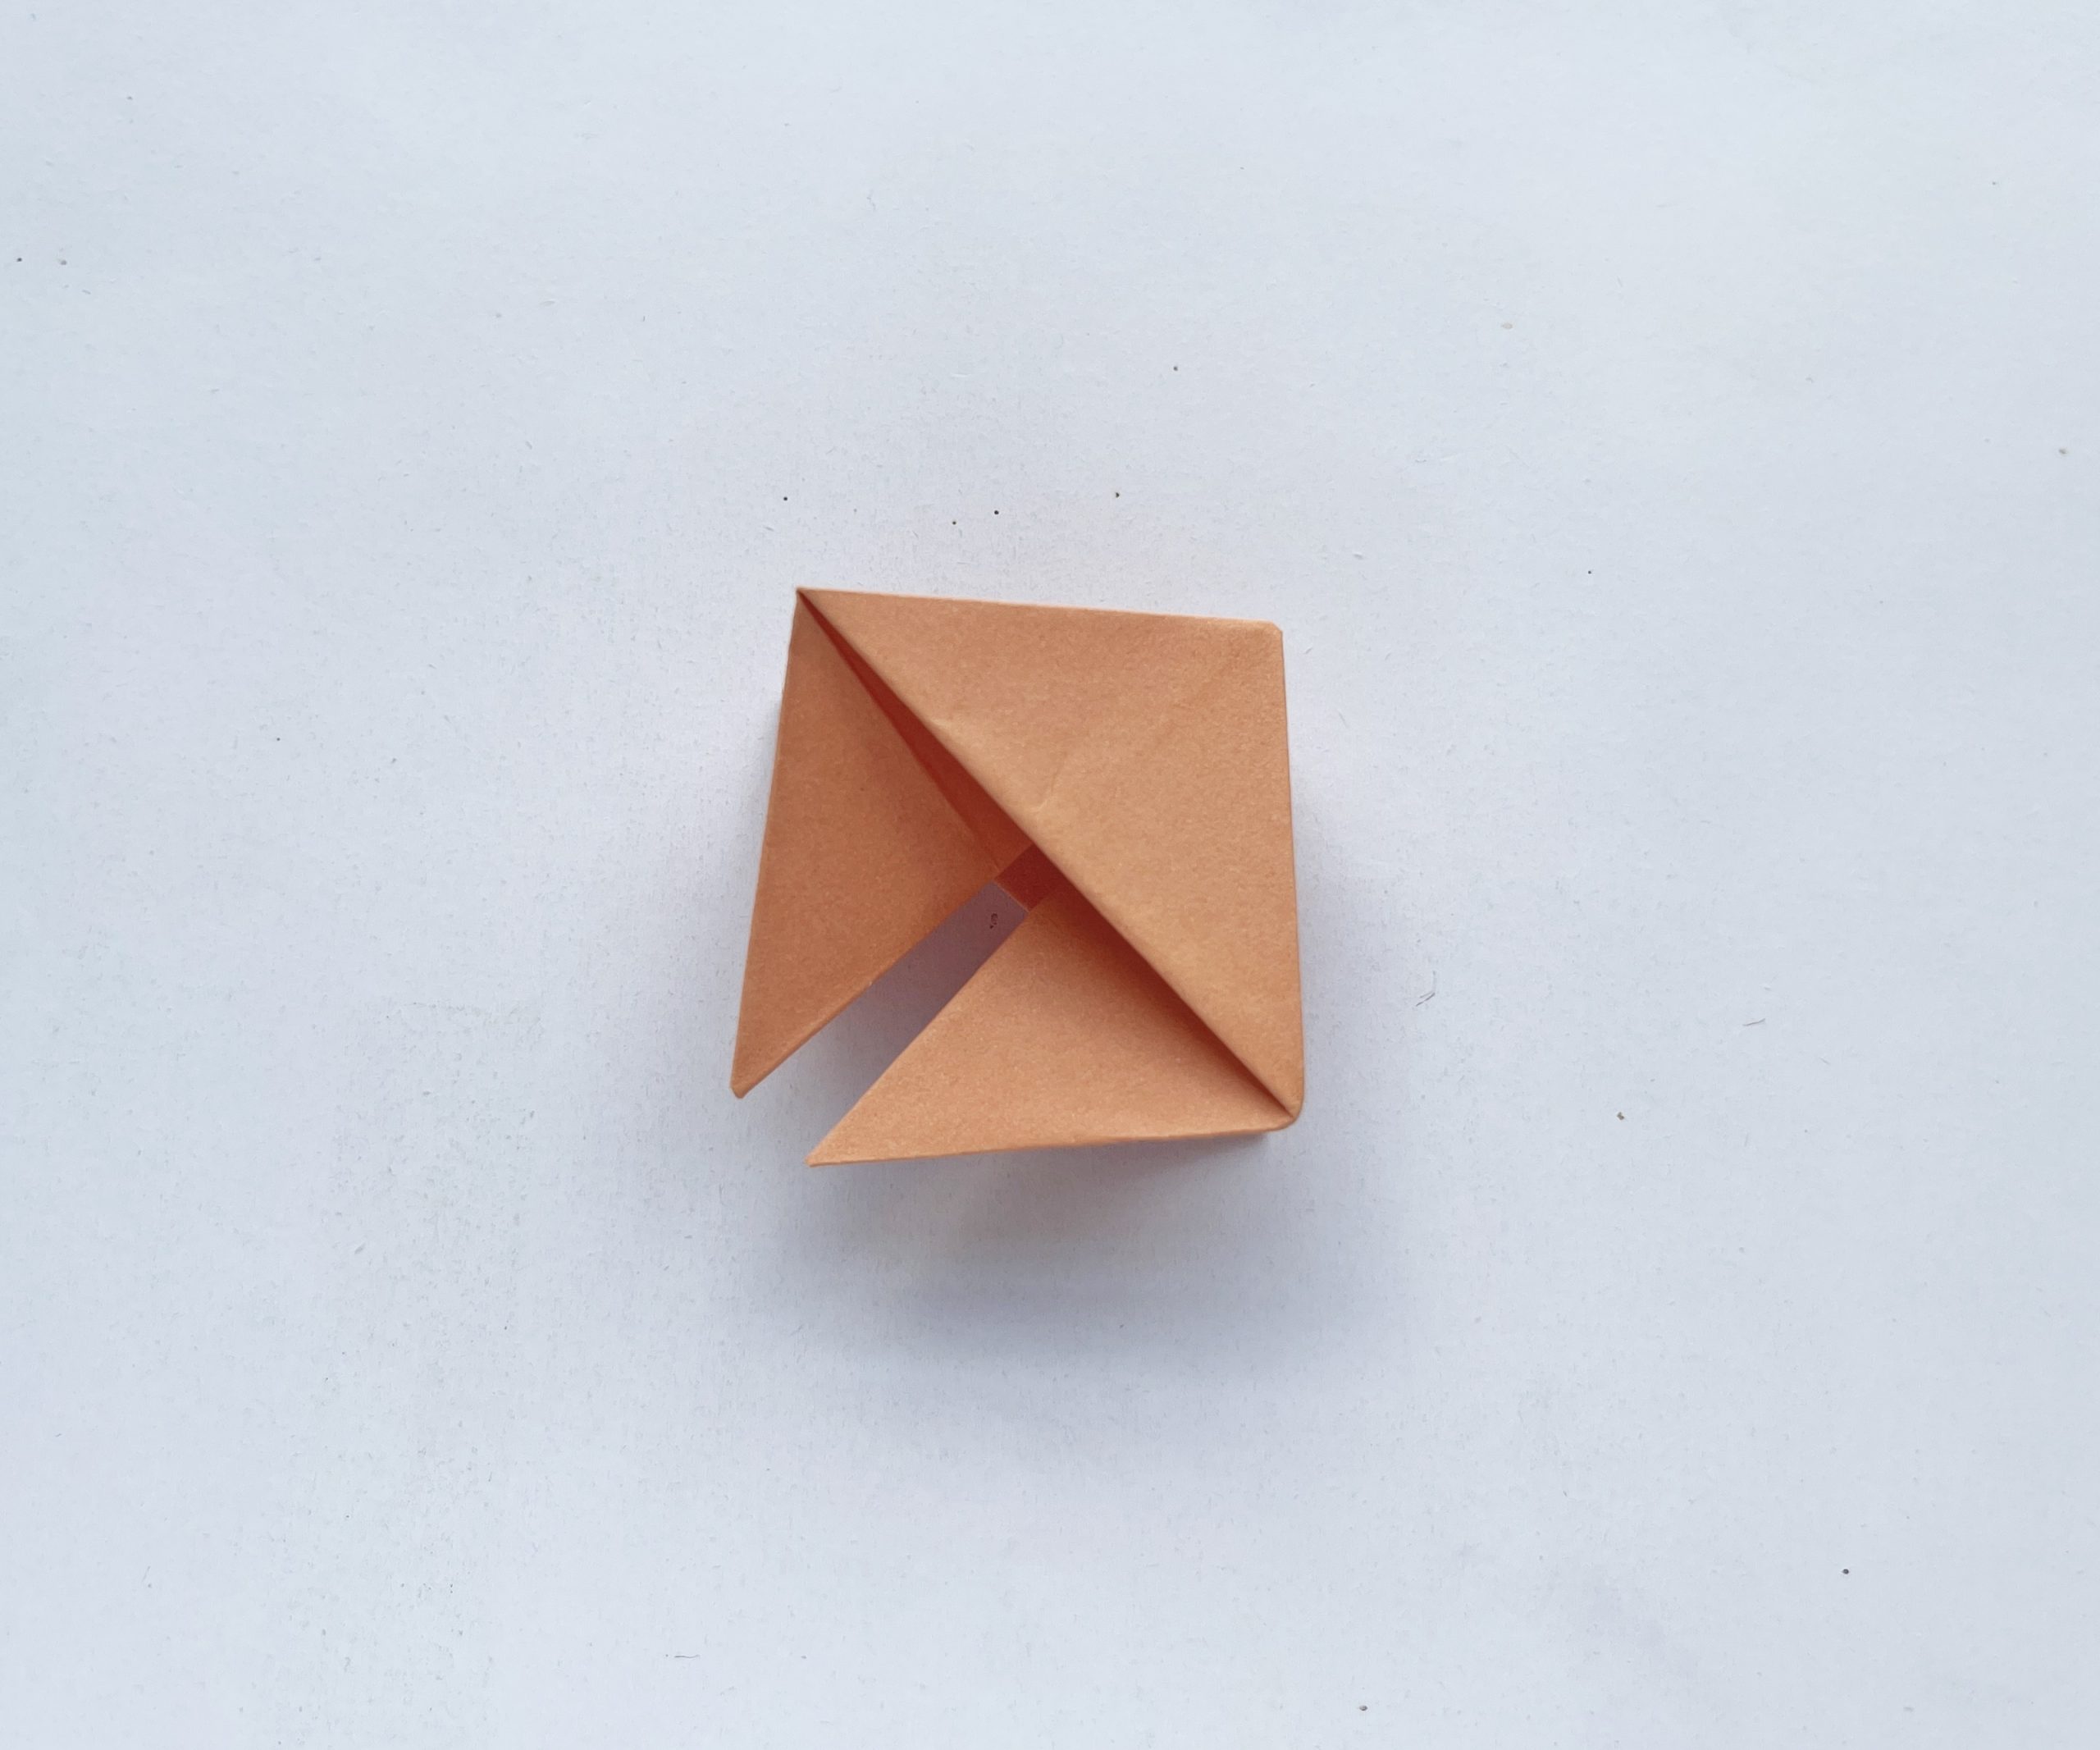


Use the last crease to fold the paper inwards. This will be the head of the origami chicken pattern.
Let me know how long it took you to make your origami hen.
Perhaps this will inspire a series of folded paper farm crafts. What other animals would you like to see? How about some cow origami or even an paper pig tutorial.
Other Easter Origami Ideas include my Origami Bunny Rabbit and how about trying to make an Easter basket through folding paper? I have never tried this but it is on my to do list
Will you make this Origami Chicken?


Hi there, I’m Laura an avid kids crafter with two little ones of my own to keep entertained! I have been doing kids crafts since 2018! Here at Easy Crafts for Kids you can find seasonal crafts for all age groups, as well as drawing tutorials, coloring pages and some other fun printables!
A student
Thursday 13th of February 2025
Because of your tutorial, I could complete my biology homework. Thank you so much!
Crafty Critters
Friday 14th of February 2025
I bet you get an A grade for your chicken origami! It's a great classroom project also!
A student
Thursday 13th of February 2025
Thank you for saving my life!