
Send Birthday greetings with this DIY Birthday Cake Pop up Card. Kids can make this using my instructions and free templates.

[ez-toc]
Pop Up Birthday Card DIY
Everyone likes to send Birthday cakes to friends and family. Little kids love to make cards to send! Quite often I let my children freestyle a card.
Sometimes they ask me for ideas on a themed card to send. I have made lots of great pop up cards for Birthdays. Some of the card crafts we have completed can be seen below.


Making an actual card with a picture of a Birthday cake is a great idea especially when you cannot be there in person with the recipient to eat cake. It is also great for all ages and both boys and girls.
Learn how to DIY Birthday cake pop up card for kids using step by step craft process below! Little kids can make this with Mum or Dad’s help. The early steps involve lots of cutting while the later steps involve some gluing pieces together.
How to Make a Pop Up Birthday Card
Printable Instructions – Please note 3 templates are at the bottom of this post
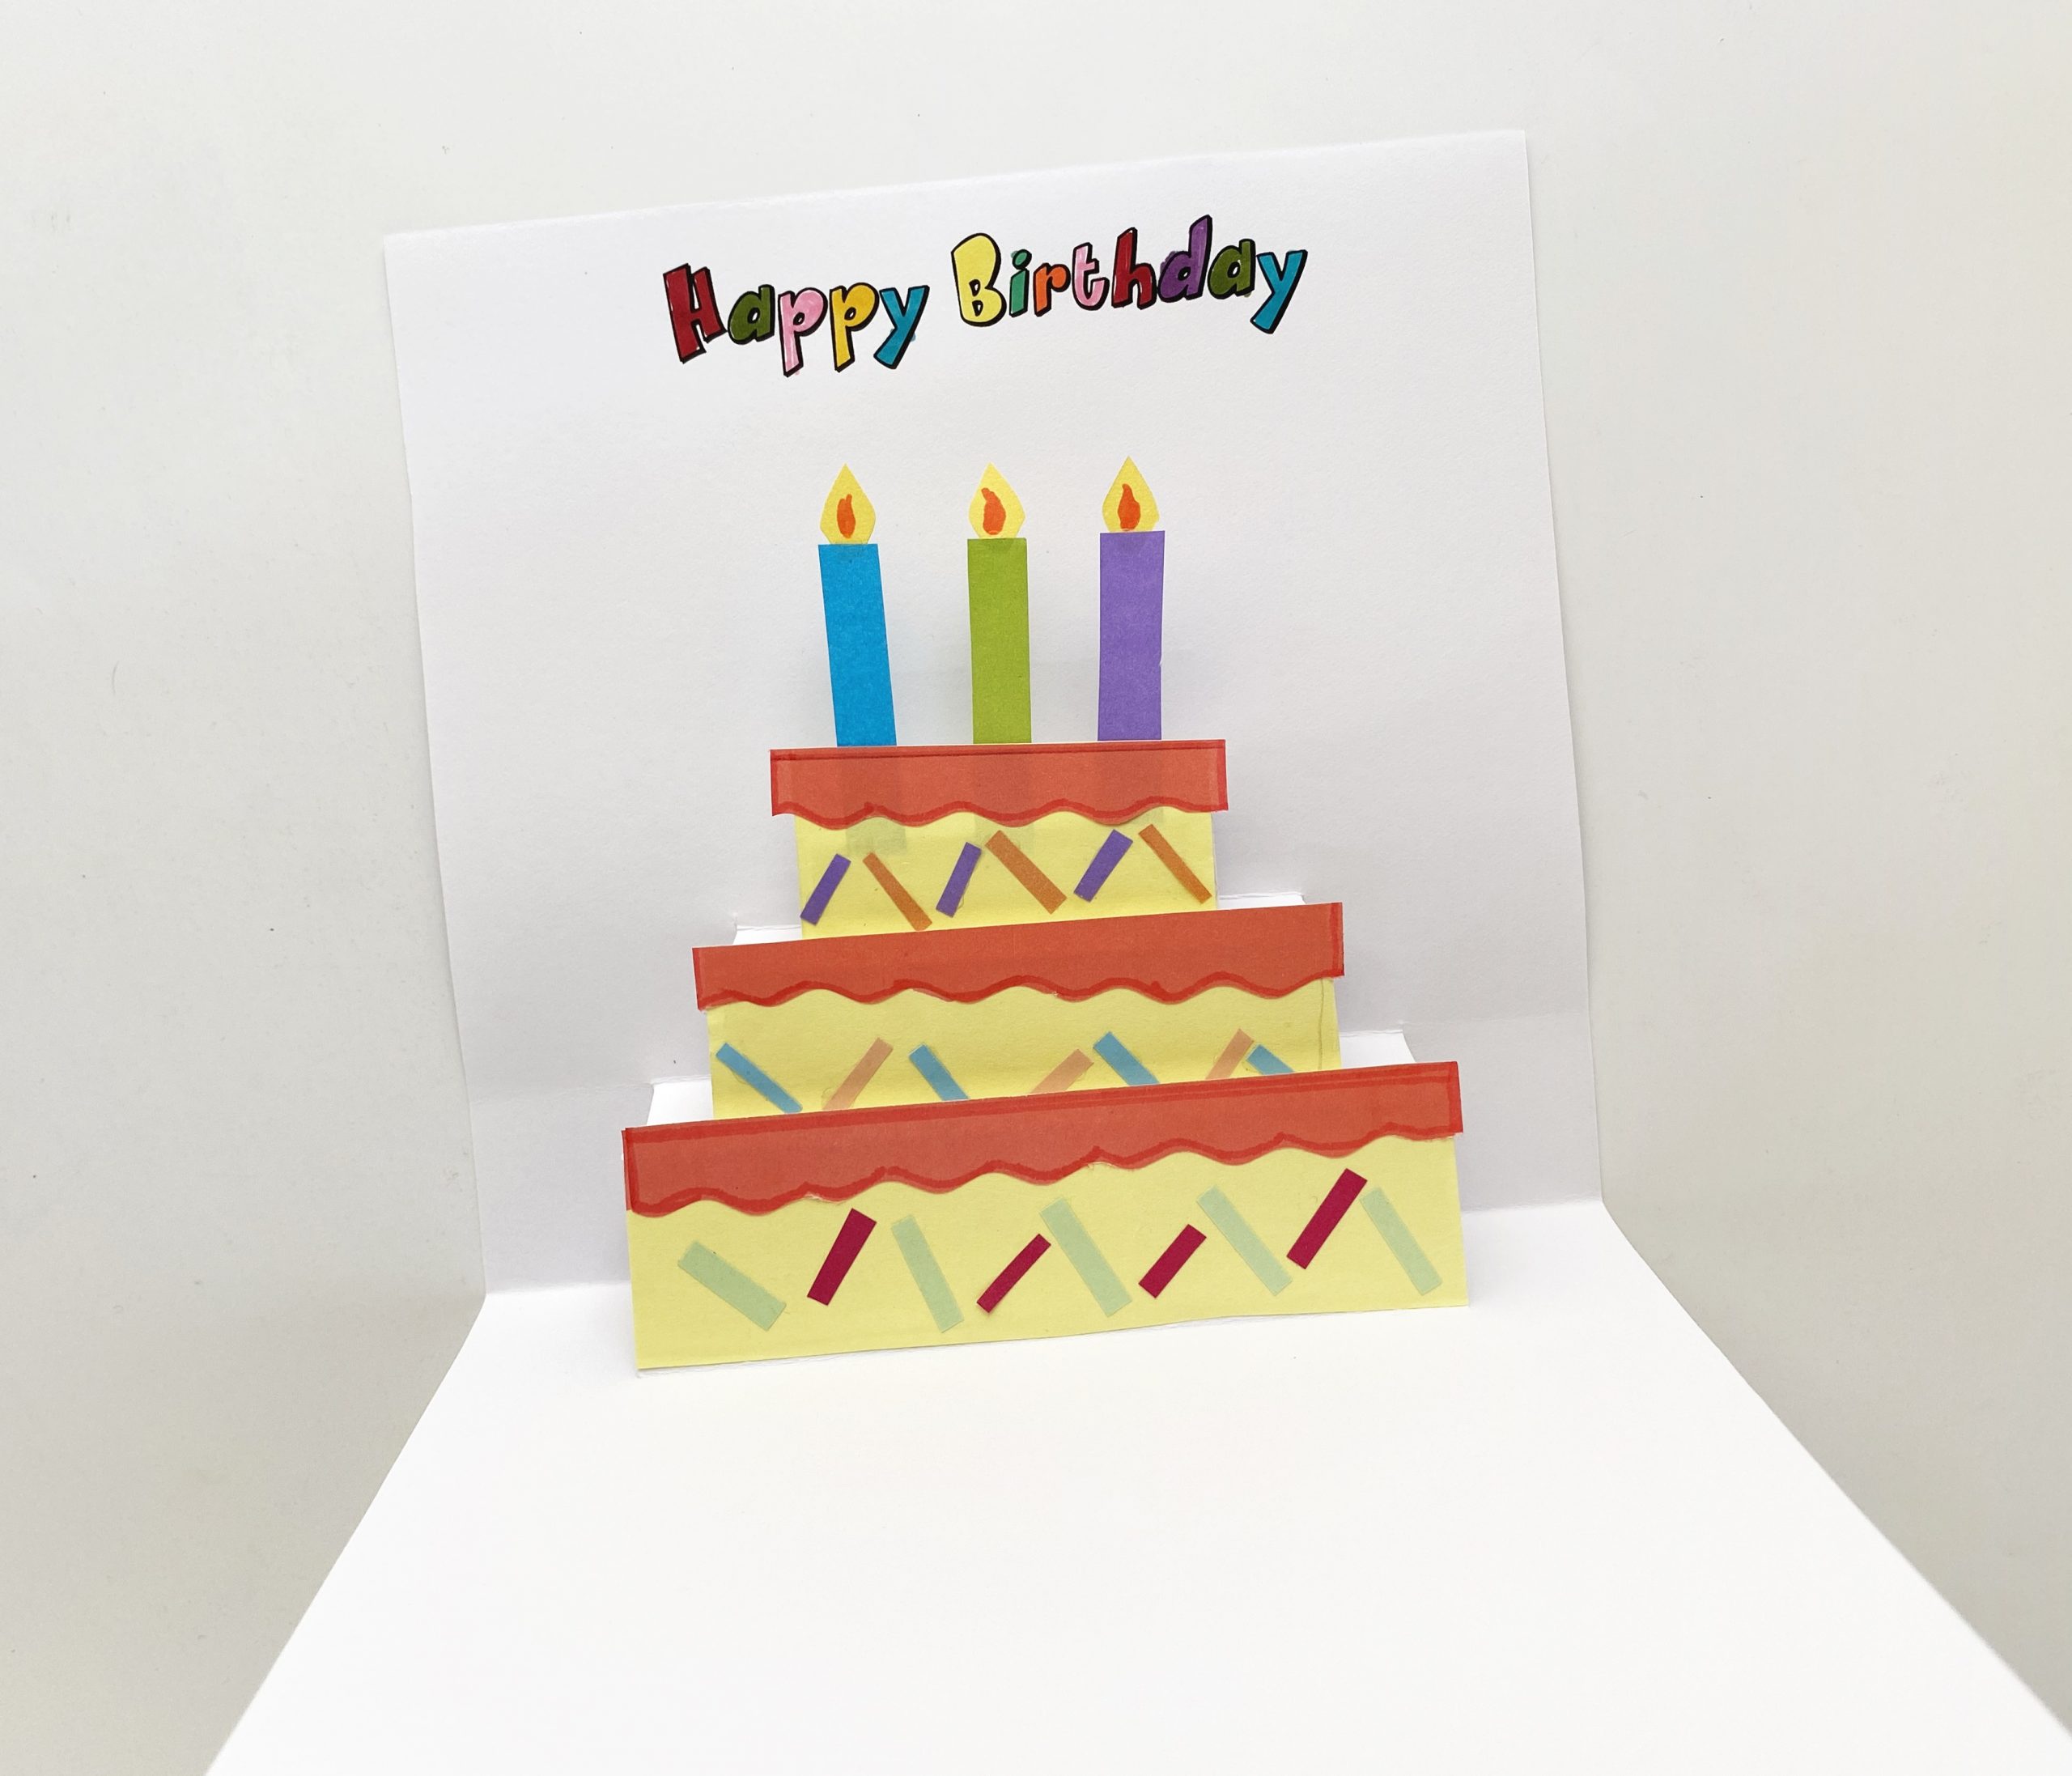
Send Birthday greetings with this DIY Birthday Cake Pop up Card. Kids can make this using my instructions and free templates. Take cardstock paper. Fold it in half. Draw the lines on the closed side of the card using the “Card Template”. Cut along the red lines and make a horizontal fold according to the green line on the card. Image below will show you what it should look like. Fold the cut-out part inside the card. Similarly, make the second cut. Fold it inwards like in the previous step. Cut the third paper and fold it inside the card. Open up your card. Color the letters using colourful marker pens. The littlest of children can do this. Cut out the pieces for the cake and the frosting. Glue the frosting on the cake, Glue the sprinkles on the cake. Cut out the candles. Glue the flames on the candle, and gather all the pieces to make the cake. Glue the candles and smaller cake pieces on the top pop up socket. Glue the rest of the cake pieces on the second and third pop up sockets. Cut out the gift boxes, ribbons and balloons. Glue the ribbons on the boxes. Glue the gift boxes on the card. Glue the balloons on the card.
DIY Birthday Cake Pop up Card
Materials
Instructions
Step 1:
Step 2:

Step 3:

Step 4:
Step 5:

Step 6:

Step 7:
Step 8:

Step 9:

Step 10:
Step 11:

Step 12:
Step 13:

Step 14:
Step 15:
Step 16:
Step 17:

Step 18:
Step 19:

Birthday Cake Pop Up Card Template Free Download
Please print my free PDF Templates to make this craft as easy as possible:-
Happy Birthday Writing Template
Can you think of any other Birthday pop up cards you would like to make? You could easily feature your favorite things, like a cat pop up Birthday card if you like cats
Will you DIY Birthday Cake Pop up Card?


Hi there, I’m Laura an avid kids crafter with two little ones of my own to keep entertained! I have been doing kids crafts since 2018! Here at Easy Crafts for Kids you can find seasonal crafts for all age groups, as well as drawing tutorials, coloring pages and some other fun printables!
Rosemary
Tuesday 14th of March 2023
There is no template for the card
Crafty Critters
Tuesday 14th of March 2023
Three templates at the bottom of the post.
Pat
Thursday 2nd of February 2023
Oh help. I am a grownup but am having an awful time getting these folds correctly places. YOur pictures look like you don't make the fold on the green line but just below it to create a 'ledge'. All other sets of instructions I have seen want me to cut to the fold line, then fold on that line. It does not leave me tith a ledge but a horizontal layer the same size as the vertical layer. For the life of me, I cannot fathom waht I am not seeing. Please suggest what to do!